Saturday, April 30, 2011
Current Blog
I'm moving all my model railroading activities over to a single blog, Some Railroad You've Never Heard Of (Blog)
Monday, October 11, 2010
First Figure
Well I finish my first 7/8th scale figure. Actually, he's a tad tall and he's probably more like a 1/12th scale figure. Oh well.
Yesterday our hero was headless. Tonight he received a head, hat, hand, and rake.. uh.. thing.


I went for a more caricatured look because, well, I like that. Seen here I think he's cooling after his 4th baking. Overalls, hat, and hand are now in place.


Yesterday our hero was headless. Tonight he received a head, hat, hand, and rake.. uh.. thing.

The wife told me to stop using her professional baking sheets and to use a disposable aluminum one instead. Oops.


Sunday, October 10, 2010
Back in Production
Well now that things are starting to settle down a bit for me, I started putting in a little work on the coach. For now I've set aside the chassis -- I have neither the space or the tools at this point to work on that in our new [temporary] apartment. This, however, gives me a chance to focus on the coach body and accessories.
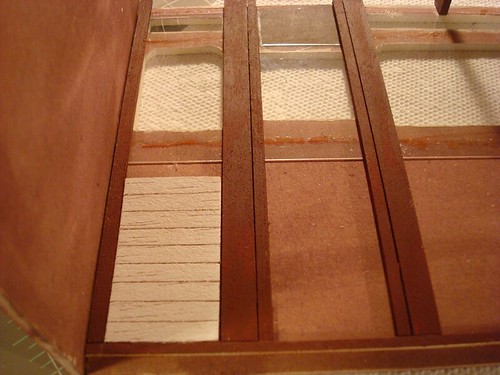
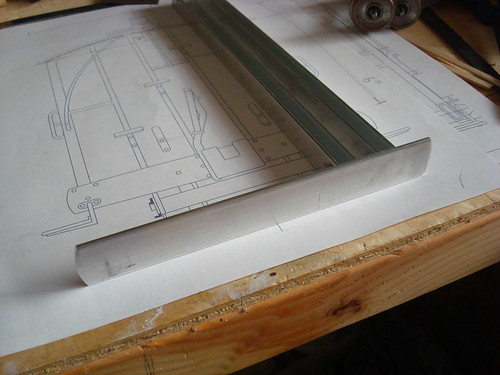
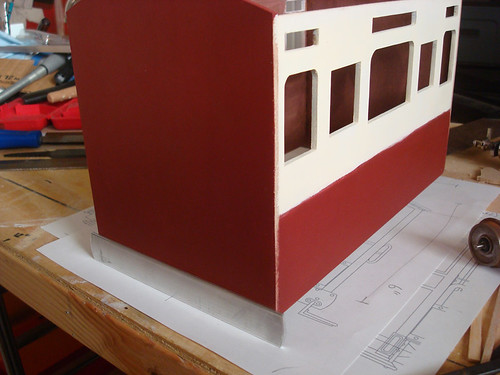
I managed to install most of the lower paneling for one of the sides. The picture below shows the progress and the coach over top of the photo of the real deal. I've been pretty happy with the results so far.

The windows on the opposite side have also been installed and I've begun to start cutting door trim pieces for the other side as well. Once I get in all the trim for the 4 corners I can begin to do the wood paneling for the shorter sides as well. As you can see from the picture that will just be all white.
In addition to working on the coach I also took a shot at trying something completely new....

Following an article in Garden Railways magazine, I created an aluminum foil "skeleton" to start from. Leilani's comment at this point was, "the arms are too long...".

After coating the skeleton in Scupley II and baking it, I began to do some initial shaping. This is my current progress, though you can see it's still a bit rough. I would have kept working on it but I ran out of clay. Major things still left to do are the head and left hand.

Friday, April 2, 2010
Coach Chassis Progress
Building the chassis for the coach out of metal (aluminum) meant that I needed to learn some new ways to do things. As it turns out, MIT (yes, that MIT) has a collection of 10 video lessons online giving a complete introduction to machine shop tools and techniques. For free. I've watched about the first half of them, so when it came time again to work on the chassis I took a shot at trying them out.
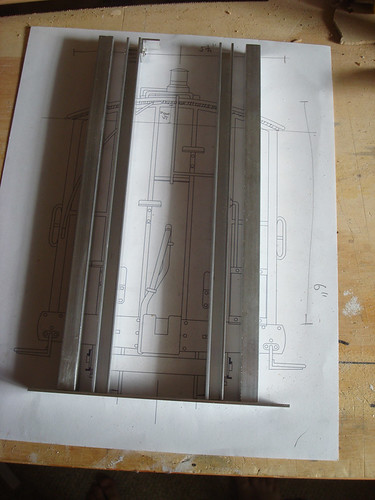
From what I've gathered, layout is one of the most crucial steps. Woodworkers have that saying -- "measure twice, cut once." The same holds true for metal work, however being precise is brought to a new level. When I was building the chassis, I needed to make sure that I got the width in which the wheels would be mounted as exact as I could.
To do this, I started by making black lines on the metal in the general area where I was going to make a mark. This gave me a surface to scratch off (this is an easier and faster way of doing what most machinists would use blue layout dye for)...

You can probably guess I used a sharpie for this. With the black in place, I started my measurements, then use a scribe which is basically a sharpened piece of metal rod to scratch off the black where I needed the line. This left a very high contrast line to work by. Note that the width of the line here is a bajillion times skinnier than a pencil line and allows for a greater degree of accurate measurement and layout...

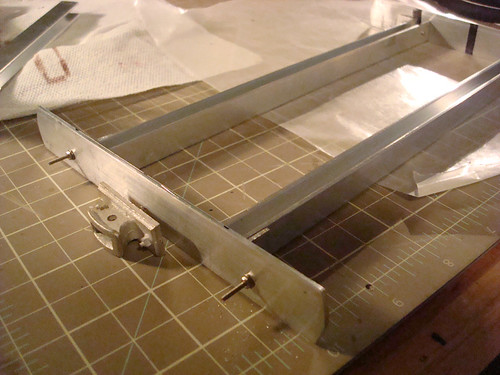
With accurate lines I was able to construct the chassis to be the proper width to mount the wheel journals (axleboxes) on...
Now when it actually came time to seat the body into the chassis, I realized something...

From what I've gathered, layout is one of the most crucial steps. Woodworkers have that saying -- "measure twice, cut once." The same holds true for metal work, however being precise is brought to a new level. When I was building the chassis, I needed to make sure that I got the width in which the wheels would be mounted as exact as I could.
To do this, I started by making black lines on the metal in the general area where I was going to make a mark. This gave me a surface to scratch off (this is an easier and faster way of doing what most machinists would use blue layout dye for)...
With accurate lines I was able to construct the chassis to be the proper width to mount the wheel journals (axleboxes) on...
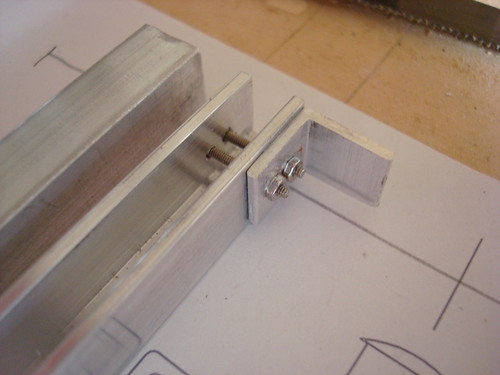
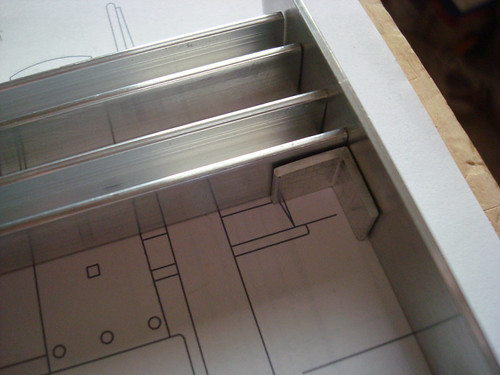
I haven't yet bolted the journals on, but here's an idea of what they might look like once mounted...
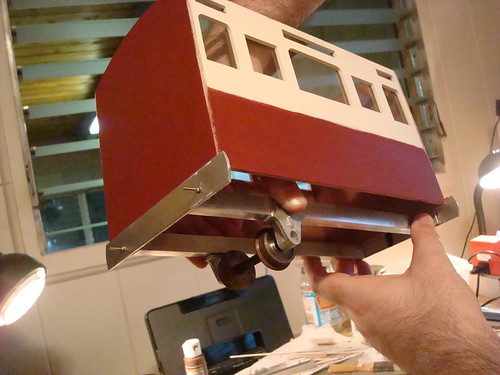
...the chassis is less than 1/32 of an inch too short! In some sense I'm kinda proud that I was able to be that accurate without a caliper or some sort of other measuring device and by using just hand tools (hack saw + file), but on the other hand it means I need to shave down 1/64" off of either side. I'm sure it won't be a huge deal to fix.
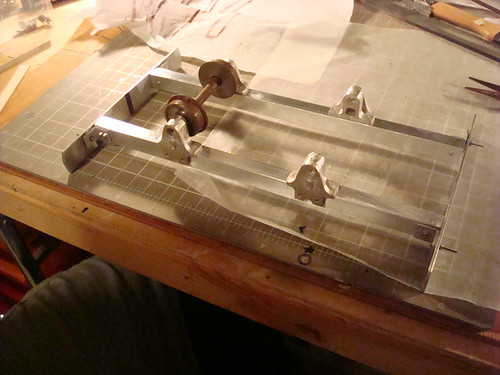
I was curious how it would look and perform with the wheels in place, but wasn't quite ready to commit and bolt down the wheels. So I measured the approximate location and taped them in place just to be able to see and try it out. Here's a short video...
Saturday, March 27, 2010
Coach Interior Paneling
I had today off and ended up falling asleep in the afternoon for a couple of hours. It seems that ended up tweaking out my "tired" schedule because it's 2AM and I'm posting pictures on the blog!
Anyways, with the coach it's starting to feel that for the amount of time I'm putting into it, it sure doesn't look like it.
These next couple of shots don't look at impressive, but it's what I've been working on...
Anyways, with the coach it's starting to feel that for the amount of time I'm putting into it, it sure doesn't look like it.
These next couple of shots don't look at impressive, but it's what I've been working on...
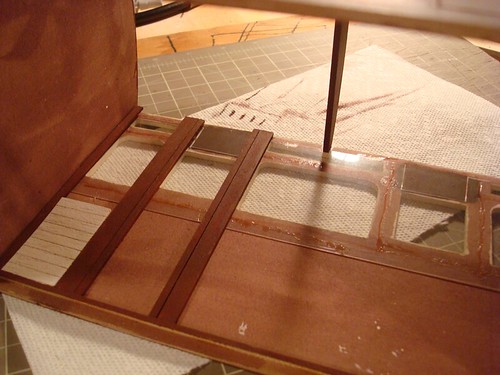
- The "window glass" has been mounted on one side
- I've started to cut and prep the interior paneling
- In the shots below, none of the paneling is glued in place (but the "window glass" is)
- You can also see one of the roof rafters is also in place
There's this real ugly orangy-brown line of glue where the "window glass" is glued down. That will, of course, be covered up by paneling eventually.
Thursday, March 25, 2010
Chassis Update #2
Here's some progress shots of the chassis...
And my first bolted joint... It's a little rough, but this one will be on the interior (unseen) so I have some room to practice before I get to the visible ones.
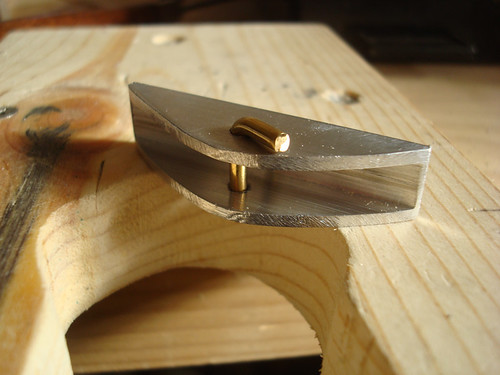
And just for kicks I tried making a link-and-pin buffer coupler. It's very rough and I probably won't use it but it was amusing to try.
And my first bolted joint... It's a little rough, but this one will be on the interior (unseen) so I have some room to practice before I get to the visible ones.
And just for kicks I tried making a link-and-pin buffer coupler. It's very rough and I probably won't use it but it was amusing to try.
Wednesday, March 24, 2010
Coach Chassis
Being that I completed the basic form of the coach body and because I need to do some more planning for the coach interior, I started working on the chassis. I didn't want the body to get too far along before I began on the chassis because I'm trying to develop all of it kind of at once so that things get done on different parts instead of completely finishing one facet.
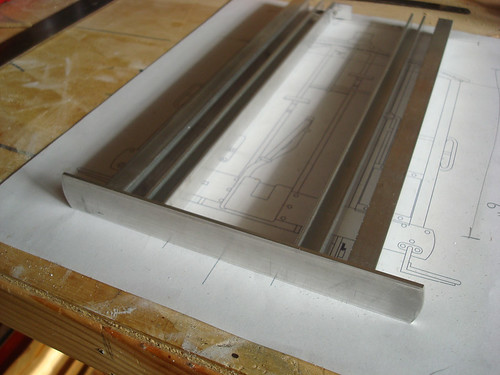
Anyways, I decided the chassis would be made of aluminum. My initial draw to this was that on the actual prototype Coach the chassis is metal and the body wood, so I feel I'm at least being true-er to the original by doing so. Also, the metal won't be glued but cold fastened. This, I'm hoping, will give it a lot more strength and pulling power.
The last time I worked with aluminum was actually when I did a robotics science fair project in the 10th grade. Fortunately one of the local hardware stores has an assortment of smaller sizes in 4' lengths. As far as aluminum goes, it's quite soft, so I'm assuming it's a lesser grade. On the plus side, it's easier to shape.
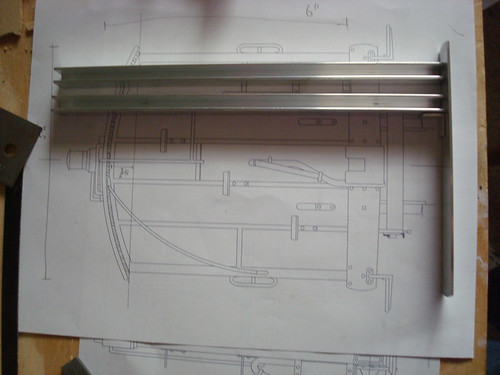
The chassis is made from channel aluminum with a strip for the end bar. I couldn't locate any L-brackets that were small enough for this, so I guess that means I'm making those too!
For now I'm waffling between bolting it all together with 0-80 or 1-72 hex head bolts -OR- using 1/16" rivets. If I can find a reasonably priced rivet bucker I might just go that route.
I found out this past weekend that Stanley Slack is squeamish about using hand tools, so just for him I'd like to point out that everything you see above was cut with this very hack saw...
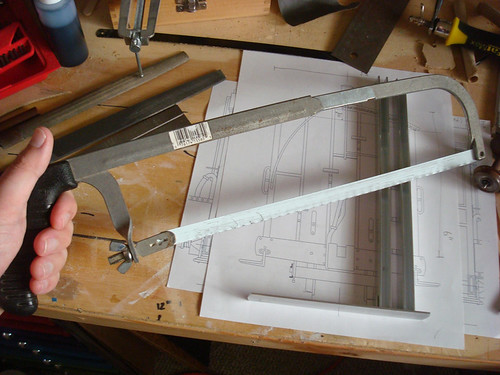
The final chassis will be primered and then painted in black (that might have been a subtle Rolling Stones reference there). Here's what it looks like in it's natural silvery color...
Anyways, I decided the chassis would be made of aluminum. My initial draw to this was that on the actual prototype Coach the chassis is metal and the body wood, so I feel I'm at least being true-er to the original by doing so. Also, the metal won't be glued but cold fastened. This, I'm hoping, will give it a lot more strength and pulling power.
The last time I worked with aluminum was actually when I did a robotics science fair project in the 10th grade. Fortunately one of the local hardware stores has an assortment of smaller sizes in 4' lengths. As far as aluminum goes, it's quite soft, so I'm assuming it's a lesser grade. On the plus side, it's easier to shape.
The chassis is made from channel aluminum with a strip for the end bar. I couldn't locate any L-brackets that were small enough for this, so I guess that means I'm making those too!
For now I'm waffling between bolting it all together with 0-80 or 1-72 hex head bolts -OR- using 1/16" rivets. If I can find a reasonably priced rivet bucker I might just go that route.
I found out this past weekend that Stanley Slack is squeamish about using hand tools, so just for him I'd like to point out that everything you see above was cut with this very hack saw...
The final chassis will be primered and then painted in black (that might have been a subtle Rolling Stones reference there). Here's what it looks like in it's natural silvery color...
Subscribe to:
Comments (Atom)