I'm waiting on adding the wheels because, well, they're not here yet! I bought some 14" solid wheels from Sierra Valley Enterprises last week. I still haven't figured out the journals (the part that attaches the wheel bushing to the underframe).
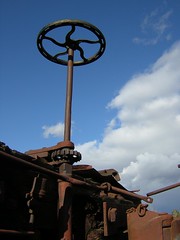
In the mean time, I figured I would work on other aspects of the car. First mini-project: the brake wheel. Older railroad cars all had a manual brake on them. It was operated by turning a wheel on the top of the car, which forced the brake pads under the car to press against the wheels.
Brake Wheel
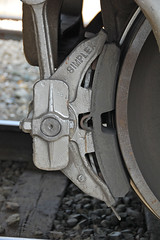
Brake Pad/Shoe on the Wheel:
So having said that, my mini-project was to scratch build the top part, the wheel, of the car brake. :D
I took 4 tries. Here are the first 3.
- First Attempt: Bottom center -- Soldered brass wire.
Unsuccessful because: Unsturdy, fell apart, material length inadequate, oddly shaped - Second Attempt: Top right -- Hand-filed styrene
Unsuccessful because: a ton of work for something not that impressive. I didn't even bother to finish it because of the amount of work the ring took - Third Attempt: Top left -- rubber O-ring with styrene rung insert
Unsuccessful because: I couldn't figure out a way to "stiffen" up the outer O-ring. It's rubber and too flexible. That and paint wasn't sticking to it that well either.

So after all of that, I decided to give soldering another try. I should point out that I actually received the soldering iron as a birthday gift last month from my Mom and Stan. It's a Weller variable temp iron. It has the capacity to be turned up *really* hot and made soldering brass quite a bit more reasonable than the $8 piece of junk I'd been using (not to mention that it has quite a selection of tip sizes available for it).
Ah, so fourth attempt I'm finally happy with. Here's the brake wheel in it's raw brass and without the joints cleaned up:

And here's a closeup of it mounted on the flatcar. The joints have been filed down and it's been painted (a rusty silver/black finish).

Here's the progress on the whole flatcar so far:

And just for kicks and giggles I started working on a potential load for the flatcar. Here's a water tank that it might carry around. I say might because I may or may not use it for this flatcar. I might save it for something later on...

No comments:
Post a Comment