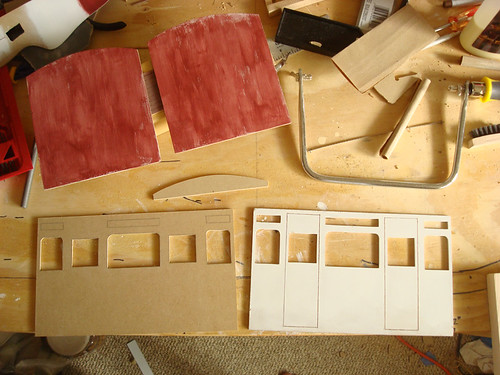
Even though you won't be able to tel the difference, I tried to match up the windows as perfectly as I could. They ended up being within 1/32" close to each other.
Here are all the body parts laid out together and a rough first coat of paint on the end pieces. The body panel on the left still needs to have the upper observation windows cut out of it. Speaking of cutting windows, I'm just about tired of doing that. In all I've ended up cutting 16 windows for both of these body sides. The original, mind you, had over twice that.
The paint looks really bad right now only because it's the first coat. I find it better to do many light coats than to do one heavy, overly-thick coat. The downside is the paint job looks bad for a bit.
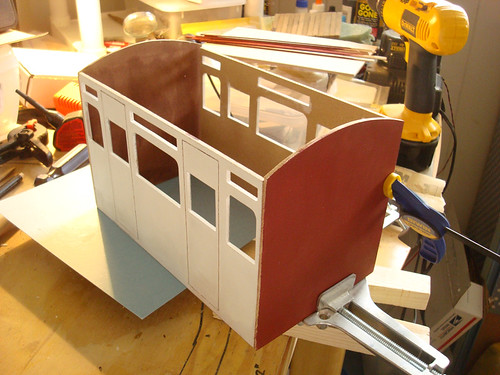
And the finally a very important moment came... when the body first started to be glued together. Now, I'd like to point out, I was so excited about this happening, that I didn't bother to check and make sure that everything lined up. You can clearly see in this picture the body panels have shifted and don't line up. I discovered it about 15 minutes later, and had to go back and sand those joints and try again. They lined up the 2nd attempt. Lesson learned!
And here's the unit almost completely glued together. I still need to do the last joint, which I'll probably do after lunch when the glue is fully dried.
You can also see in that last shot that the interior has a very rough coat of dye on it. The interior walls will be covered with paneling, but I just wanted a rough darker brown color to be present if the gaps in the paneling board let any light shine down into it.


No comments:
Post a Comment